Organising Your Stash


I started with digital scrapbooking about 8 years ago now and as my supplies grew I very quickly became aware that I would need to implement some kind organisation system on my computer. There is no right or wrong way to do this and it is just a case of finding what method suits your personal needs best.

There are several ways to effectively organise your digital supplies and I will show a few different methods for you to consider.
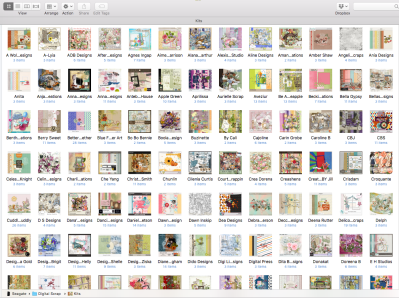
A Visual System.

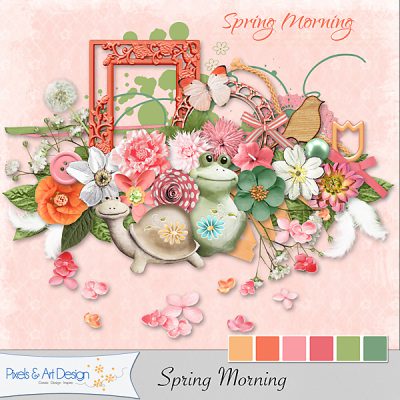
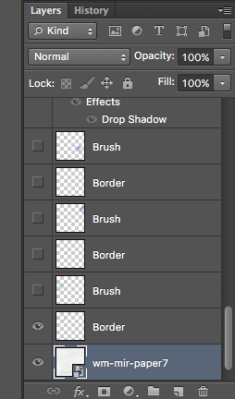
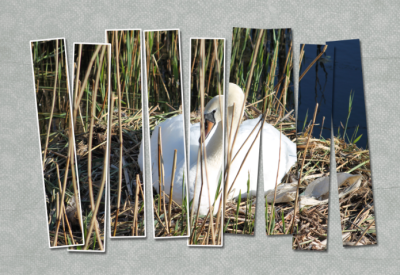
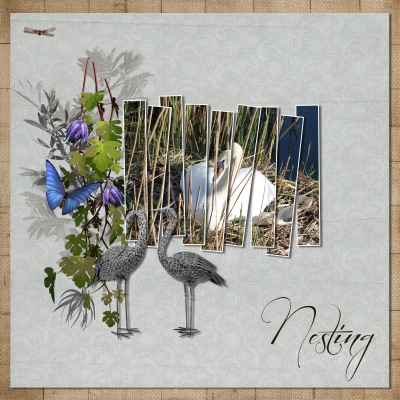
Over the years I have tried out different ways and I finally think I have found the systems that best suits me. Being a visual kind of person I also like to have a preview image of the kits as the folder preview, that way I can see at a glance the style and colours of each kit without having to go into each sub-folder to find something. This is what my folders look like inside the main Kits folder. This system would be more useful for those who have a huge collection of supplies from a wide variety of sources. This system is a nice simple and easy to set up systems.

Set Up Folder Previews On A Mac.

You can create a custom icon for any file or folder using the kits preview image.

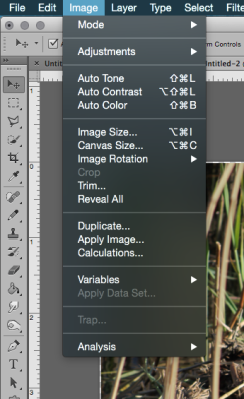
1. Copy the picture you want to use to the Clipboard.

One-Way to do this is to open the picture in Preview, choose

Edit > Select All, then choose Edit > Copy.

2. Select the file or folder whose icon you want to replace, then choose File > Get Info.

3. At the top of the Info window, click the picture of the icon, then choose Edit > Paste.

Set Up Folder Previews On Windows.

1. Start Windows Explorer, and then locate the folder that you want to customize.

2. Right-click the folder, and then click Properties.

3. On the Customize tab, select the folder picture option.

4. To find the picture that you want to use to identify the folder, click Choose Picture.

Category System.

The category system is best suited for someone with small stash quantities or prefer a minimalist approach.

Ali is still fairly new to digital scrapbooking and probably doesn’t scrap with such a wide variety of designers like I do, so her more simplified approach is probably more than adequate for her needs. Her system is best suited for someone with a smaller stash or one who prefers a minimalist approach.

A List Of Possible Categories.

Actions
Albums
Alphabets
Brads, Etc
Christmas
Embellishments (includes subfolders: Butterflies, Circles, Clocks/Time, Dates, Element Combination Packs, Hearts, Metals (no words), Ribbons/Strips, Stars, Tags, Words)
Journal Templates
Layered Templates
Masks
Negative Sleeves
Overlays
Paper_Patterns
Paper_Solids
Photo or Frame Clusters
Stitched

Here’s a look at how to organize your category folders.

Using A Program.

There are lots of different ways you can go about organizing and storing your digital elements. What you choose will likely depend on a number of factors including hard drive space, time, interest, level of organization, number of products, amount of digital scrapbooking you plan to do, etc.

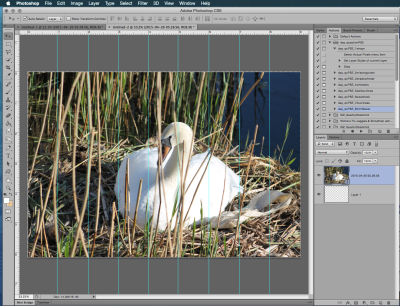
From reading a bit about this online I have found that people use a variety of different programs to organize their digital elements including ACDSee, iPhoto, Adobe Bridge, Picasa, and Shoebox. I believe the key in all those systems is tagging the products to make searching easier.

A Guide To Backing Up Your Files

Backup

A Guide To Backing Up Your Digital Files

When was the last time you backed up all your important documents and photos? In a world of digital data, we all have tons of pictures, documents, financial information and more all stored on our computers. We are using our computers for just about everything in our day-to-day lives.

Setting up a good backup system can seem time-consuming and intimidating but its neither and anyone can easily do it so that your files are backed up automatically to an external hard drive and to online cloud storage.

The recommendation for a good back up is the 3-2-1 rule, this means three copies of your data, two local backups on different devices, the first being your computer, the second an external hard drive or USB and the third being online cloud storage. Using this system means you are highly unlikely to lose all your data.

Here are a few great ways to back up your data and best of all it doesn’t take long to do and can be inexpensive.

EXTERNAL HARD DRIVES AND USB STICKS

External hard drives today can be inexpensive; depending on the size you required to store your files. There is also a choice of buying either a desktop drive or smaller portable drives. External hard drives are easy to setup and you get a huge amount of space for very little, for example, a 3TB for around $140. Not forgetting the tiny USB sticks, these tiny products are relatively cheap and can hold up to as much as 128GB and are probably the better option to CDs or DVDs as they are less susceptible to damage.

FREE ONLINE STORAGE

Most companies will protect themselves against data losses that could put them out of business by keeping off-site backups. We can do the same, using free online storage.

As well as backing things up on external hard drives and perhaps USBs – CDs or DVDs, you can also upload files to the Internet on sites that offer free storage space.

The simplest online backup is just a fixed amount of storage that works as a folder on a server. You can upload and download files whenever you like. This can also be very useful if you are travelling around with a laptop.

Links To Some Free Online Storage Sites.

Although some of these sites are not back up services you can store a certain amount of files for free as a safe place to keep copies of your files. Most of these sites will offer both free and paid for storage.

Google Drive allows you to have a massive 15g of data for free.

https://www.google.com/drive/

Idrive allows 5g of data for free.

https://www.idrive.com/pricing

Dropbox Individual allows 2g of data for free.

https://www.dropbox.com/individual

Box allows 10g of data free.

https://www.box.com/en-gb/pricing/individual

Microsoft One Drive offers 5g free data storage.

https://onedrive.live.com/about/en-us/plans/

Zoolz will offer you an amazing 100g of free storage.

https://home.zoolz.co.uk/100gb-free-lifetime/

PAID FOR ONLINE STORAGE

If you use a free online backup service, you won’t have enough space to back up a whole hard drive, just essential files.

The usual sales strategy is to get people hooked with a few free gigabytes then get them to upgrade to a paid-for service with more storage.

There is a wide choice of online backup options including Mozy, Carbonite, Box, Dropbox and SugarSync. Microsoft’s OneDrive is a simple service that offers 7GB of free storage space with more available to purchase. Apple’s iCloud service comes with 5GB of free storage which, with paid for add-ons, can be extended to 55GB. Some PC suppliers, such as Asus, offer free online storage with portable PCs.

Links To Some Paid For Online Storage Sites.

Dropbox Individual paid for option starts at $11.31 per month for 1TB storage.

https://www.dropbox.com/buy?_tk=individual_hero_button

Box offers a personal pro account for their paid for storage starting at $11.31 per month for 100GB.

https://www.box.com/en-gb/pricing/individual

SOS Online Back Up starting from $4.99 per month for 50g

https://ecommerce.sosonlinebackup.com/cart/Pages/personal/index.htm?src=homepage-personal-compare-bottom-btn

Spideroak $5.00 a month for 150g

https://spideroak.com/one/

Microsoft One Drive offers 50g for just $1.99 a month

https://onedrive.live.com/about/en-us/plans/

For more detailed information about online storage visit Martin Lewis at The Money Saving Expert here.

https://www.moneysavingexpert.com/shopping/free-online-storage

A Word Of Warning

It’s not wise to rely wholly on online backups because there’s no guarantee that you won’t lose your data.

Web-based companies frequently change their business terms and strategies, and they can be taken over or go bust. You could suddenly be faced with paying a monthly bill – or given just a few days to download all your data, or lose it!

People can also lose access to their data if their computer is hacked, if they lose their password and cannot recover it, or if they are locked out of their account for reasons unbeknown to them. It happens.

Online backup services are a great addition to local backups, not a substitute for them, so please be sure to use these services as an extra precaution to saving your data and not the only one.

Also, don’t forget, the sites themselves can be hacked – so be careful what you put on these sites!

connection-1268089_1920

Lets Celebrate iNSD

Happy International Scrapbooking weekend.

Its that fantastic time of year again that is focused on us scrappers and creative people.

We at Pixels would like to thank all our customers, readers and forum members for being a part of Pixels. We know you have lots of digital scrapping shopping choices on the web and we very much appreciate your support, it’s a real joy to get to know you all in our forum challenges and we hope you all enjoy being with us there too.

If you are a reader of our newsletters you will probably already be aware of our Designers who are hosting a sale in their stores but if you are not pop along to our store to find some fabulous savings this weekend, you won’t be disappointed. If you feel like a chat with some of our members or designers then the forum is the place to be this weekend.


Free Collab For May

Would you like to be the owner of this fabulous collab……


Join us in the forum and take part in the challenges for MAY and you will soon be the owner of this gorgeous collab by Pixels designers.

Working With Templates & Free Template Gift

Today I would like to share with you a tutorial on using templates, this is a simple tutorial primarily for beginner scrapbookers.

I have used a quick and simple template to create these two pages.

Working With Digital Scrapbooking Templates.

Digital Scrapbooking Templates is a great technique, for those who want to quickly create an instant easy layout for their albums.

Getting Started.

Open the digital scrapbook template PSD file in your program.

First, we need to fill in the background papers; it is easier to work from the bottom layer upwards.

It is sometimes easier to hide the layers that you are not working with at the top.  This makes it easier to see what you are working on, especially if the template has lots of layers. You can hide the layers by clicking on the tiny eye icon for each layer, as shown in the image below.

Open the folder that contains the kit you have chosen to use, making sure you have the bottom layer selected you can now drag your first paper onto the canvas work area.

Your paper layer can now be merged down to template layer below or even deleted. Follow the same process as above for templates where you have additional paper layers to add, making sure you have the correct template layer selected so when you drag in your paper layer it will fall above the template layer.

Now you can add a drop shadow if you wish to the paper layers.

Turn on the elements layers back on using the eye icon as you did before when turning them off.

Open the kit folder and with the first element layer selected drag in your chosen element. Once you have the element in its place the template layer can be turned off or deleted. Add a drop shadow to your element and repeat this process for all the following layers. You may also use additional elements.

You can download these two templates to practice with from the store, they are free to download during the month of April and also include the pdf tutorial document.

First Layout – For Beginners

Today we have our beginners first layout tutorial for you and to help all you beginners we also have a lovely free starter kit for you to download. This tutorial was created using Photoshop Elements 15

You download the kit HERE. The kit also includes a pdf file for this tutorial.

Before you begin, make sure you have downloaded the two zip files for the Starter mini kit and unzipped their contents.

Open Photoshop; select – File, New, Blank File

In the window pop up type in the name of your layout, change the Width and Height to 12 inches.

Select File on the menu bar again but this time you will select Open, navigate to the Starter Kit Papers folder.

Select your background paper and drag into your Photoshop elements layout.

You will notice that your paper is now loaded into the Photo Bin as shown in the image below.

Make sure you have your blank layout selected, you should see a blue outline around your document as shown in the above image and then drag the background paper image upwards to your blank document.

You will now see the background paper in your layout

Using the same method as above go to File, Open and navigate to your photo folder and drag in the photograph you wish to add to your layout.

Now you can also start to add some elements from the Starter Kit elements folder. But you may want to resize some of your images and elements, so to do this go to the Image tab in the menu navigation bar across the top. Select Transform and then Free Transform.

You will now see the image has a black border with some anchor points, using the anchor points you can resize the photo or element to your desired size. Once you have the correct select the green tick to complete.

Now to add some drop shadows to create a realistic look.

Select the layers tab at the bottom, this will show you your layers down the right-hand side, with your layer selected that you want to add the drop shadow too (highlighted in blue)

You now need to select the styles tab also at the bottom.

Select the drop down arrow where it says bevels and in the drop down window select Drop Shadows.

You will notice that you have a selection of shadow styles to choose from, select one that you would like to use to add it to your element.

Once you have all your elements in place resized and shadowed as required you can add your text title and journaling.

Here is a simple sample layout.


3D Cut Out Technique

How to create a digital scrapbook layout using the CutOut Technique

untitled1

Step 1: Open a new document in Photoshop and drag in two background papers. Decide what shape you would like to use. You can create your own border using the shape tool too.

untitled

NOTE: To create my heart border I opened a new document, selected the heart shape tool and duplicated the heart layer to make 12 hearts. I then rearranged the hearts to different sizes and angles to create my border. Once you are happy with your shapes merge them all together and then drag them into your layout document.

 Step 2: To make heart border cut out you will need to use CTRL+click heart border layer for Windows and CMD+ click heart border layer for Mac users. You should see the marching ants around your shapes as shown in the image below. Be sure to select the paper LAYER you wish to make the cut out into once selected, hit the delete key.

untitled4

Step 3: Now either delete or turn off the shape layer (click the little eye icon to turn the layer off). Your background paper one will now show through. Add a shadow to background paper two, using the tiny fx button at the bottom of the layers panel. Generally, a light grey color would be used for shadows but in this layout, as the background is a black paper then the shadow also needs to be a dark grey color.

untitled5

Using the same methods above use a single heart shape to create a cut out for your photo to sit behind. Place your photo in between the 2 background papers like I have in the image below.

cut-out

Once you have completed your cut out and your photo is visible you may find you have to resize or move your photo around accordingly.

untitled7

untitled8

Download the PDF here.

The History Of Pixels

As most of you are probably aware Pixels & Art has celebrated its 2nd birthday this month and I wanted to share with some questions I have had about how Pixels started.

How did you come up with the name Pixels & Art Design?

The name Pixels & Art Design was born by a combination of thoughts, any kind of designing is an art form and designing digital products is derived from pixels and so Pixels & Art Design was born.

Why did you decide to open up a shop?

I had been designing since 2010 and I have been on a design team of 4 stores during that time all of which closed down during a 4 year period. It seemed each store I joined would close its doors within my first year and I wanted to part of something that I could feel more secure.

What is the best part of being a store owner?

Definitely, has to be meeting and getting to know lots of new people across the world.

What’s been the highlight of owning the shop?

The highlight of owning a store is when our lovely customers message us with kind words and show us their layouts they have created with Pixel products, we just love that.

What’s been a time you’ve had to struggle with the shop?

The worst time was when our host was attacked by DDOS which brought havoc to the store’s log ins and then having to start from scratch again.

What’s your idea of how the shop differs from other shops out there?

We truly care about all our members, store customers, forum and gallery members. We pride ourselves in trying to help all of our members on their digital scrapbooking journey. And we are a unique little friendly family.

When did the shop officially open?

We opened our store doors officially on the 12th February 2015

Do you have a lot of people helping you run the shop or is it mainly you?

We have a small team who regularly help out with various tasks like the newsletter, blog posts and some technical back office.

If you could restart, would you have opened the store what advice would you give to someone wanting to apply to your store?

Yes, I would but I think I would have done a lot more research before starting. I think anyone wanting to join our team just needs to be happy to be an active member of the team.

What advice would you give to someone wanting to start their own store?

That definitely has to be doing lots of research in all aspects from setting up a store to finding a reliable host company and also most importantly is to recruiting dedicated Designers and Creative.

Gift Basket Hybrid Project

How to use your digital papers and elements to create these pretty gift baskets.

img_1033

Favour Or Gift Basket Tutorial

Today I have a really simple hybrid project for you by Chrissy of Wisteria Moments, created with the Let’s Celebrate collab kit. These baskets can be made in minutes and are ideal for all those last minute little gift projects that you need in a hurry.


These adorable Favour Baskets will make lovely small gifts for all the family and friends they can be used as table favours at dinner parties or any other celebration events.

The only tools you will need is some scissors, double sided tape or glue and of course your printer.

Print two sheets onto an A4 card. I recommend that you use a minimum of 150gsm for best results. For a sturdier basket, you can use a heavier weight of card/paper if your printer will accept it.

2017-02-20-12-04-30

Cut out the design along the solid black lines only.

2017-02-20-12-31-28

Now fold all along the dotted lines.

2017-02-20-12-34-52

Use double-sided tape or glue to attach the two sides together first, this will make sure the box is aligned correctly.

2017-02-20-12-37-03  2017-02-20-12-37-33

Fold in the bottom flaps and secure with double-sided tape or glue.

2017-02-20-12-40-10

Attach the two strips together to form a sturdy handle.

2017-02-20-12-45-26

Then attach the handles to each side of the basket and fill with your favourite sweets.

2017-02-20-12-49-11

The pack to create these baskets is in my store and will be free for a limited period only. I have included the PSD template in the pack so you will also be able to attach your own papers and elements and design your own baskets.

wm-gb-preview


Cutting Photo’s into Strips

Today’s tutorial we will show you how easy it is to cut your photo’s into strips to create an interesting style to your layouts.

Step One

Open your chosen photo in Photoshop, the first step will be to slice your photo into strips, we will do this by dragging the ruler guides from the left-hand side across the photo to the left. To do this first you need to go to View and make sure that you have extras and rulers both checked as shown below.

image-1

Now you are able to hover over the left-hand side ruler and drag across a blue guide at an equal distance apart, your guides will be visible as a blue line.

image-2

When you have completed adding your guides your image will look like this.

image-3

Step Two. We are ready to start slicing our photo using the Rectangular Marquee tool.

image-4

Using the rectangular marquee tool, draw a selection for your first slice; note the marching ants around my selection. Once you have the first section-selected press Command/Control-J and this will place the selection onto its own layer.

image-5

Continue to select each slice to place it into its own layer until you have completed the whole photo, you need to bear in mind that each time you select a new slice section to check that you are in the Background Layer in the layers panel. Otherwise, there will be nothing to slice from.

image-6

Step 3. Turn off the background visibility by clicking on the eye icon. Now you will need room to move your photo sections around, so to increase your canvas size go to Image tab and Canvas size.

image-7

Select each slice to move it around either up or down and right or left.

image-9

Once you have arranged your slices into the pattern of your liking you can link all the layers together by using the Command/Control key and selected each layer in the layers panel on the right and then click on the chain link icon at the bottom of the layers panel.

image-8

You will now be able to drag all of the slices together onto your layout.

My completed layout.

image-10

If you would like the pdf tutorial you can download it here.