

Create and Apply Bokeh Overlays In Photoshop
Bokeh, also known as Boke and is one of the most popular subjects in photography. The reason why it is so popular is because bokeh makes photographs visually appealing, forcing us to focus our attention on a particular area of the image. The word comes from the Japanese language, which literally translates as blur. In this tutorial, I will show you how to create a bokeh using a blurry photograph to create the effect, save it as an overlay and then applying it to a second photograph. This tutorial explains how to create a bokeh in both PS and PSE.
So for this tutorial, you will learn how to create and apply bokeh overlays using your blurry photos.
The easiest way to create bokeh overlays in PS is to use the Field Blur filter and PSE users it is Lens Blur.
This blur contains an effects fly out tab that allows you to create bokeh effects out of the bright areas of the images.
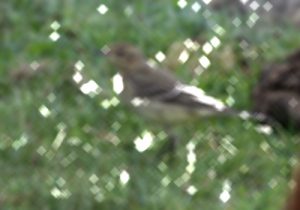
The contents of the photo are not important, as long as the images are not too bright.
Creating The Bokeh Effect
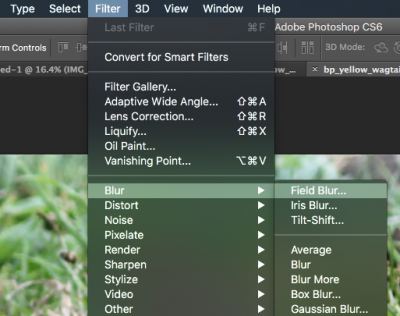
PS users will select the Filter tab, Blur and then Field Blur.
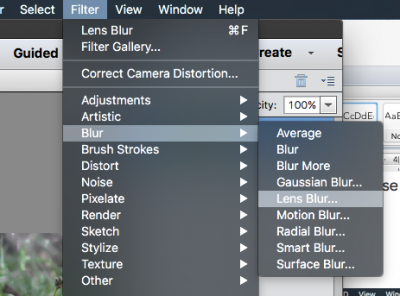
PSE users will select the Filter tab, Blur and then Lens Blur.
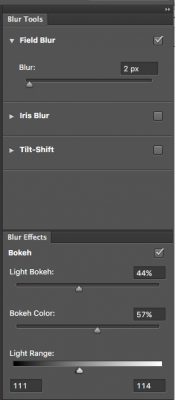
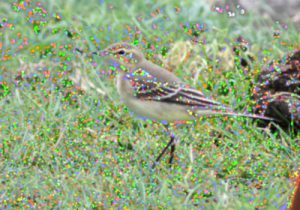
The effects tab opens to the right. Here you will need to adjust the Light Bokeh, Bokeh Color, and Light Range to create the bokeh effect on your photo. To adjust the size of the bokeh add or subtract Blur by using the Blur slider.
Increasing the Blur slider will make the bokeh light circles larger. Increasing the Light bokeh will create more light circles and increasing the bokeh colour will make the light circles take on some of the colours from the image itself. Moving the sliders around will give some pretty amazing effects so I do suggest that you have a play around with the sliders until you find something that you really like. Your photograph should result with having large or small blurry circles of light or colour.
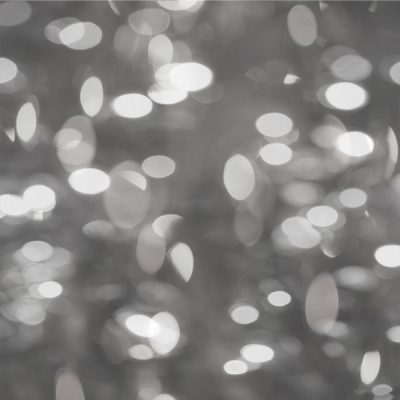
You can see from my two images the different effects you can achieve.

Save your image as a jpeg somewhere where you can find it easily. Now open the layout image that you would like to apply the bokeh too.
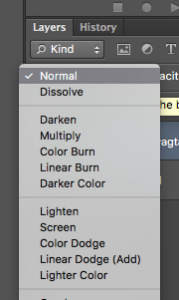
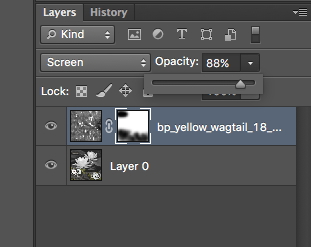
Place your bokeh overlay as the top layer and resize it as necessary to cover the whole image. With the overlay selected and using the blending modes select the screen mode.
Create a layer mask so you can brush out the parts of the overlay you don’t want to keep. Below, notice that the word tab is covered by the overlay, which will need to be masked out.
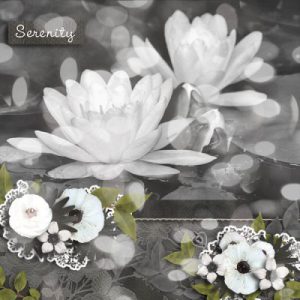

With your layer mask selected in the layers panel and using a black soft-edged brush start to brush out the unwanted areas of the overlay. The opacity of the overlay can be lowered to your own taste.
Completed Layout

If you would like to download the PDF file for this tutorial use this link.
